So tents - Maggiolina and Columbus models - are available now. This shipment was to have arrived at the end of November but was delayed due to production of new models - but more about that later.
Wednesday, December 30, 2009
Monday, November 30, 2009
Fiberglass Care
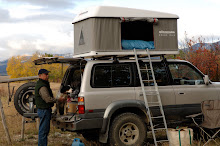
Florida is called the "Sunshine State" for a reason. Because we are traveling so much our Columbus is on our car full time and bearing the brunt of this. It is nice having the shade of the tent, keeps the car much cooler.
I have been noticing something odd. The windshield has some white deposits, like calcium deposits. The tent isn't quite so shiny either, UV damage, chalky gelcoat is sluffing off the tent's roof. Automotive wax is OK but it takes a lot of effort because gel coat is soft and doesn't polish as easily as automotive paint. I'm working with some fiberglass boats so I took a little 3M Fiberglass Restorer and it is easy. Looks like new, but then again it is only a couple years old.
Tuesday, June 9, 2009
New Maggiolina Changing Room
 Announcing a new, improved changing room for the Maggiolina series. Available in standard or 4X4 (tall model). These are now on order... prices TBD.
Thursday, May 7, 2009
Aerodynamics
The first rooftents we had were these boxy affairs, aerodynamics just wasn't important. After all, if you were driving much over 55 in your trusty Series Land Rover, you were pushing it. Today, this has all changed, when Porsche designs a truck for offroad use, aerodynamics is very important.

You can still get the boxy Maggiolina Adventures by special order. They are better suited for Africa than North America or Europe. The new Maggiolinas and Columbus rooftents are designed to be slippery, to allow you to get the best mileage and to travel at high speeds, very high speeds, think German autobahns. I was surprised by how quiet they are, much quieter than the roof racks. Seriously, bare racks are noisy, they quiet right down with a Maggiolina or Columbus on them.
Here is the shape of one of the newer tents. This is a drawing I got from Italy and it shows something interesting, the flow of air under the tent. The tents act like a big wing up there. This was confirmed by some of the guys with G-Wagons and classic Cherokees. They would tell me that they keep the tents on full time because they get better mileage.
Many years ago, I used to have a big Maggiolina Adventure, full boat, as big as they come, even had a rack on top for even more stuff. This went on my old Volvo wagon, my trusty off-road vehicle at the time, and the mileage suffered. I went from a constant 22 down to 19 or 20, down at least 10%. Something was wrong, turns out you don't want a rooftent wider than your car or truck's roof, my tent was way too wide. There seems to be a funny end plate thing that goes on like at the edge of a wing. If you get a tent about the same or less width as your roof, the aerodynamics are very good. When I got a medium Columbus, still a big tent, my mileage went back up to 21 or 22.
Getting back to the air under the tent. Turns out, this is a good thing. Years back, I had to go up to Port Townsend to pick up a large table. No problem, just break it down and put it on the rack, but then I couldn't carry a rooftent. My wife will only sleep in a rooftent or a four star hotel, she is a girly girl, hates bugs and loves comfort, so without a rooftent it gets expensive. My solution was to carry two sets of racks. The tabletop would go on the low racks, and I had the Columbus on some super high bars at least a foot above the roof. My guess was that the aerodynamics would suck, but they were actually better, got 22 to 23 mpg on this trip. It was sitting up there in clear air, looked funny but worked really well. Another thing I observed, the front of the tent was clean, no bugs. If you tent is a bug collector, try moving it back if you can, seems to help.
We can discuss the aerodynamics of folding fabric rooftents in the next blog entry if anyone is interested. Let me know.
Rich H
Friday, March 27, 2009
Attaching an Awning to a Maggiolina
Attaching an awning to a Maggiolina isn't difficult, but it is a little confusing. I'm pretty particular in my equipment, it has to be simple, light and work well or it gets left at home. The Maggiolina is a super tent when it really gets nasty and cold, only trouble, sometimes you want to go out in the nastiness and come back in. Here is where an awning comes in handy. I like to have an awning that will not only attach to the tent but is stand alone.
The standard Maggiolina awning works well but I wanted something larger, yeah, really large so I talked to our friends at Mountain Safety Research. Their Outfitter Wing is huge and fits well with a little adapting. Their new Vista Wing is smaller and may be even better. Here is what it looks like sitting flat. A couple things to note about the shape. First, there are no flat edges, they are all curved. What this does is it allows you to tighten up the whole edge so the awning can handle winds very well without flapping. The other thing to note is one side is relatively straight. This is the side that goes next to the tent . At each point is a pocket, so you can run a ridgepole from pocket to pocket. I add a couple grommets along the edge to tie up the ridgepole. More about this later.
Let me show you how the Outfitter Wing looks when set up on a Maggiolina. The awning is huge so you have lots of protected space under, the sides can go to the ground so it will act as a simple side tent if needed. I build a ridgepole that is adjustable in length. The Outfitter Wing is so large that the relatively straight side is longer than the Maggiolina. If you want the ridgepole to sit under the driprail, then you can then shorten it, hence the need for the extra grommets and lines to tie to the ridgepole. This picture shows the ridgepole tucked in under the driprail so you have a nice watertight seal between the tent and awning. When it gets really nasty, it is wise to have the awning tied up to the vehicle as well as to the tent. The tent to awning connection is strong but the awning is so large conditions can overwhelm the connection.
Here are some details on how the connection works. This is an old retrofit we used to do on the old Maggiolinas and will work on new ones too. We make up two long loops out of 1/8 inch braided rope with two small plates attached so you can loop aroung the ridgepole, more on this later. If you look closely at the picture of the Maggiolina, you can see a the loops in place halfway between the doorway and the front and back.
This cutaway drawing shows how the loops are fitted. You can see one of the secrets why the Maggiolina works so well. The fabric isn't attached to the roof directly but is attached to an inner flange. This is why the tent is so well sealed when closed. The loops fit between the fabric and the flange. There is a piece of soft aluminum that the fabric is wrapped around for reinforcement and then riveted to the flange. You need to bend this open slightly and slide the plate through the opening.
 Here is a detail showing placement of the loop and plate. Sitting inside the doorway, you reach up and over toward the front and back of the tent. Slide and flip the fabric above the joint down. This will allow you to see the opening and be able to slide one of the plates through the opening to the outside.
I like to put a toggle at the end, the type that are used for cinching up the opening in packs and parkas. REI always has a few in stock. This makes it really simple to tighten up the loops. Put the ridgepole through the loops, tighten the loops using the toggles, that simple. If you are using the awning as sun protection, keep the loops a little loose and have the ridgepole go from pocket to pocket, for maximimum size. If the wind picks up or you want protection from rain then shorten the ridgepole so it will tuck in under the roof's lip. This also allows you to give the awning added support, the straight side is now longer than the ridgepole. Attach lines to the ends and tie to the tent or rack for more protection from the wind.
This same concept can be used to attach other awning systems or side tents to the Maggiolina. One thing to keep in mind, even though the Maggiolina is really strong, awning have a lot of sail area, it is a good idea to take down the awning in high winds.
The standard Maggiolina awning works well but I wanted something larger, yeah, really large so I talked to our friends at Mountain Safety Research. Their Outfitter
 Wing is huge and fits well with a little adapting. Their new Vista Wing is smaller and may be even better. Here is what it looks like sitting flat. A couple things to note about the shape. First, there are no flat edges, they are all curved. What this does is it allows you to tighten up the whole edge so the awning can handle winds very well without flapping. The other thing to note is one side is relatively straight. This is the side that goes next to the tent . At each point is a pocket, so you can run a ridgepole from pocket to pocket. I add a couple grommets along the edge to tie up the ridgepole. More about this later.
Let me show you how the Outfitter Wing looks when
 set up on a Maggiolina. The awning is huge so you have lots of protected space under, the sides can go to the ground so it will act as a simple side tent if needed. I build a ridgepole that is adjustable in length. The Outfitter Wing is so large that the relatively straight side is longer than the Maggiolina. If you want the ridgepole to sit under the driprail, then you can then shorten it, hence the need for the extra grommets and lines to tie to the ridgepole. This picture shows the ridgepole tucked in under the driprail so you have a nice watertight seal between the tent and awning. When it gets really nasty, it is wise to have the awning tied up to the vehicle as well as to the tent. The tent to awning connection is strong but the awning is so large conditions can overwhelm the connection.
Here are some details on how the connection works. This is an old retrofit we used to do on the old Maggiolinas and will work on new ones too. We make up two long loops out of 1/8 inch braided rope with two small plates attached so you can loop aroung the ridgepole, more on this later. If you look closely at the picture of the Maggiolina, you can see a the loops in place halfway between the doorway and the front and back.

This cutaway drawing shows how the loops are fitted. You can see one of the secrets why the Maggiolina works so well. The fabric isn't attached to the roof directly but is attached to an inner flange. This is why the tent is so well sealed when closed. The loops fit between the fabric and the flange. There is a piece of soft aluminum that the fabric is wrapped around for reinforcement and then riveted to the flange. You need to bend this open slightly and slide the plate through the opening.
 Here is a detail showing placement of the loop and plate. Sitting inside the doorway, you reach up and over toward the front and back of the tent. Slide and flip the fabric above the joint down. This will allow you to see the opening and be able to slide one of the plates through the opening to the outside.
I like to put a toggle at the end, the type that are used for cinching up the opening in packs and parkas. REI always has a few in stock. This makes it really simple to tighten up the loops. Put the ridgepole through the loops, tighten the loops using the toggles, that simple. If you are using the awning as sun protection, keep the loops a little loose and have the ridgepole go from pocket to pocket, for maximimum size. If the wind picks up or you want protection from rain then shorten the ridgepole so it will tuck in under the roof's lip. This also allows you to give the awning added support, the straight side is now longer than the ridgepole. Attach lines to the ends and tie to the tent or rack for more protection from the wind.
This same concept can be used to attach other awning systems or side tents to the Maggiolina. One thing to keep in mind, even though the Maggiolina is really strong, awning have a lot of sail area, it is a good idea to take down the awning in high winds.
Friday, March 20, 2009
New shipment arriving!
Our Spring container is due in port today. We should have all our new tents unloaded and ready for shipment before the end of next week. Lots of activity right now... people are thinking about getting out after the long winter season.
Thursday, March 19, 2009
Making an interior storage shelf for the Columbus...
Rigid Tent Accessory Shelf Concept© for the Columbus Variant
Submitted by Wade Holguin The forward end of the Columbus provides an excellent location for a convenient rigid accessory shelf. This design, submitted by Wade Holguin, leverages the two inside vertical lift struts and locking screws as anchor points and spans the inside width of the tent. This accessory shelf requires only seconds to setup. It is constructed using common hardware store materials, and can be stored inside the tent when closed.
This handy shelf is simple to construct with basic tools and weighs only 3 lbs. The shelf is very useful for storage of shoes, flashlight, water/beverage container, or other small items. The use of the shelf concept assumes, of course, that occupants sleep with feet towards the hinged end, and allows ample room for stretching out.
Although the following materials list and instructions are optimized for a medium size Columbus tent the simple concept should be adaptable to both large and small sizes as well.
Note many design variances are possible so feel free to get creative anywhere you deem useful. Enjoy your Columbus more by building a simple shelf to hold your stuff!

Patio latches secure the underside of the shelf on each end to a hole drilled into each strut inside the tent. Either style J hook will work. The shorter one shows how it will look after the excess is cut off from the shelf bottom once installed. Hardware on the far right is all #8-32 x ½”.
Materials:
Quantity and Item
2 J Bolt ¼ x 4” (opening must be at least 5/8” or the loop of the bolt will not easily seat over the strut lock inside the tent). Be sure bolt has threads nearly all the way up the long side.
1 ¼” birch plywood or similar cut to 47” x 9” (for a medium size Columbus) and finished as desired
3 90 degree aluminum angle (offset) 1/16” thick, - ¾” x 48”
2 Patio door latches for sliding glass door - this type has a sliding pin that engages a hole to lock
7 #8-32 x ½” machine screws, star washers, and nuts (I used acorn/cap nuts)
5 #8-32 x ½” pan head bolts, washers, star washers, and nuts (I used acorn/cap nuts)
2 ¼”-20 washers, lock washers, and nuts (I used acorn/cap nuts)
Basic Instructions:
1) Cut each of the 3 pieces of aluminum angle to 47”. Slightly under size is OK so ends don’t protrude beyond the ends of the shelf and snag the inside of the tent. Remove any burrs and round the corners slightly with a mill file.
2) Using 3 machine screws (w/countersunk heads), star washers, and nuts, secure one piece of aluminum angle to the “center” of the shelf across its entire length (see Fig B & C). This will provide additional strength and prevent flexing. Put one screw in the center then two additional screws spaced apart from each side of center sufficient to secure the angle. Note there will be two additional screws (J bolts) one at each end of the angle (1/2” in from each end) in a subsequent step so you may want to account for equal spacing of 5 screws total. I found that I did not need to drill countersunk holes – simply tightening up the nuts on the bottom side was sufficient to pull down the machine screw flush with the shelf top.
3) Measure in ½” from each end of the shelf along the center line where you installed the angle strip and drill a hole large enough to accommodate each of the 2 J hooks. Install the bolts with the J loop at the top of the shelf pointed towards what will become the back of the shelf (Fig B). Critical for the opening between the J hook and shelf to be 1-1/4” to allow sufficient space to slip each hook over the round strut thumb screw shafts inside the tent. Once you secure the bolt to the underside of the shelf cut off any remaining length.

Side detail front of shelf is left. Note I added a plastic tip cover to the J bolt end to help minimize snag points when moving the shelf around inside the tent.


Upper photo - Right side detail showing latch mounting position. Shelf front is left so this is the right end of the shelf. Lower photo - the J bolt fits over the lift strut thumb screw shaft with the open end facing the front of the tent.
4) At this point you should have one angle attached to the center underside of the shelf spanning the entire length with the J hooks in place. Test fit the shelf in the tent (Fig F & H).
5) Attach another piece of angle to the shelf front using 5 machine screws, star washers, and nuts (Fig D). This provides a stop lip to keep things from rolling off the shelf plus gives it some rigidity and strength. I found that the top of the screws countersunk themselves flush with the top as I tightened up the nuts on the underside.
6) Repeat step 5 for the back of the shelf but arrange the angle so that the lip is on the underside of the shelf and the longer part of the L shape is on top and flat (Fig H). This adds rigidity and strength but keeps the lip from interfering with things like shoes and other items you store on the shelf. Use 5 pan head screws, flat washers, star washers, and nuts to secure.
7) At this point the shelf is nearly ready so be sure you have a nice fit inside the tent before you proceed to install the 2 patio door latches and drill into each tent strut. Note: if you do not want to drill into the struts (it won’t hurt anything if you only go past the outside first layer of the strut and DO NOT PENETRATE THE INTERAL PART WHICH MOVES AND IS ATTACHED TO THE TENT ROOF) you can mount the latches so that when extended they simply serve as stops against the struts to keep the shelf from tipping forward or backward.
8) PROCEED VERY CAREFULLY AT YOUR OWN RISK WITH THIS STEP. MEASURE SEVERAL TIMES BEFORE YOU DRILL INTO THE TENT STRUTS OR YOU MAY END UP NEEDING NEW ONES. THIS MAY VOID YOUR TENT WARRANTY. For this step placement of the 2 latches, one on each end of the shelf underside, is somewhat critical as you will be drilling one hole into each strut for the latch to penetrate (Fig E & G). I suggest positioning the shelf, leveling it, then hold the latch on the underside and adjust its position to where you think it needs to be secured to the shelf. Be sure to extend and retract the latch several times until you have the spacing right. It won’t be able to go very far inside the strut so keep this in mind. Once you think you have the latch position on the shelf correct drill two holes and use 2 machine screws, star washers, and nuts to secure each latch to opposite ends of the shelf. When you are happy with the placement of the latches then you can extend them until they touch the struts, mark your holes, and drill them out CAREFULLY using a bit size that will accommodate the latch pin.

Getting ready to push latch pin into strut hole drilled out for this purpose. This keeps the shelf from swinging.
At this point the shelf is complete and will easily store inside the tent even with the J hooks attached if you just cover them with bedding or similar material for padding. Enjoy!
Subscribe to:
Posts (Atom)